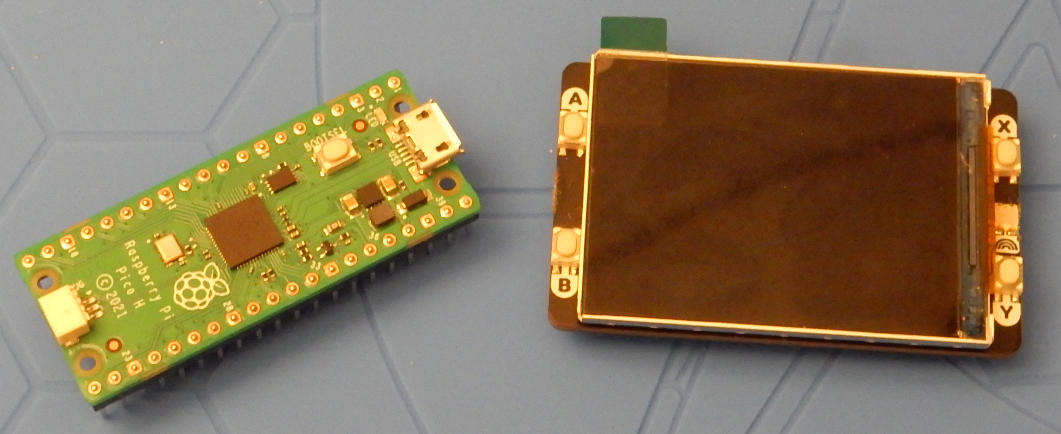
- Pimoroni Display Pack 2.0 -
Synopsis
This tutorial will show you how to get a 2" Pimoroni 320x240 IPS color LCD display working with your Raspberry Pi Pico, you'll gain knowledge on how to transfer images and emulate gifs on the screen. If you don't care about that and just like cute bats then keep reading!
Note of importance: The pimoroni display has a female header built-in so your Raspberry Pi Pico should ideally have male headers attached. Make sure every pin is perfectly straight before connecting them together.
Tutorial
First thing, be certain that the pins are all straight and don't plug the display in backwards, follow the orientation printed on the back of the display before connecting them together.
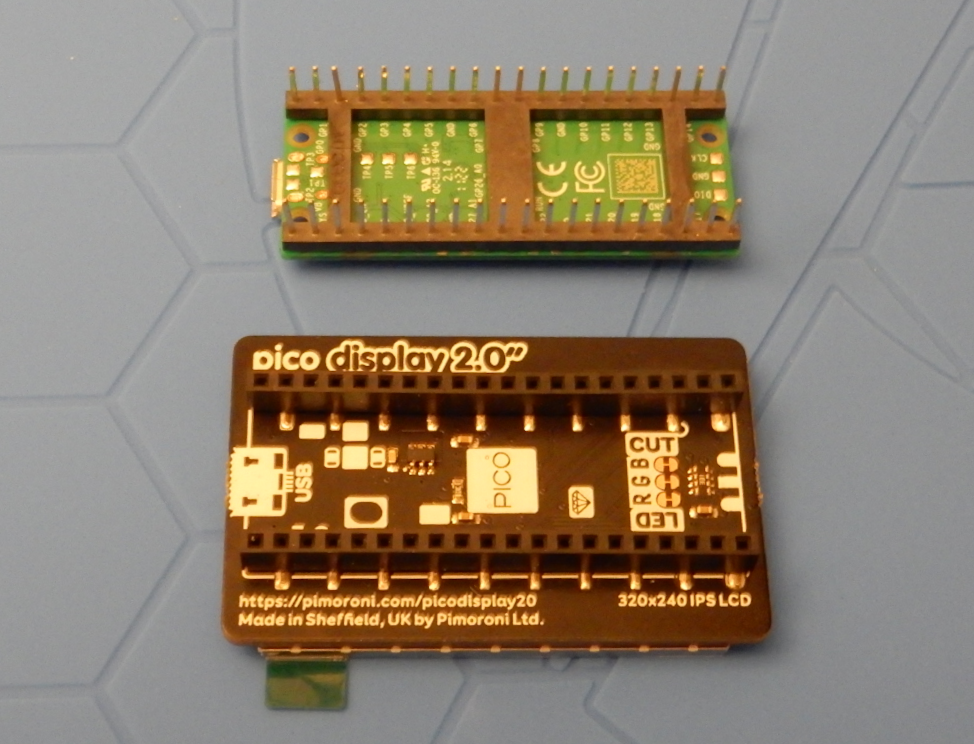
Can you spot the pin that's bent?
Your Pico needs firmware to operate so when plugging it using a micro-usb cable to your computer it should come up as a storage device. That's the internal flash memory which allows you to drag and drop a file to flash it. I recommend the newest version of pimoroni's micropython releases, you can click here to get it.

When you've downloaded the .uf2 file, drag and drop it to the Raspberry Pi Pico drive and wait a few seconds. Once it disconnects it should have successfully flashed the micropython release on the microprocessor. The pimoroni-specific release has libraries built in which makes it simpler for us.
What next?
You need an editor which lets you transfer files to your microprocessor, I use Thonny as it's simple, free and open-source. You can click here to get it.
With your Pico connected, open Thonny and in the lower right corner of the program, you'll be able to select your Pico. If there's an error most of the time it's because the Pico isn't selected and the program freaks the fuck out.

Next, to see the microcontroller's flash memory you can click the "View" button in the upper left corner of the program. It'll show a popup which allows you to click "Files"
Thonny should now look like this.
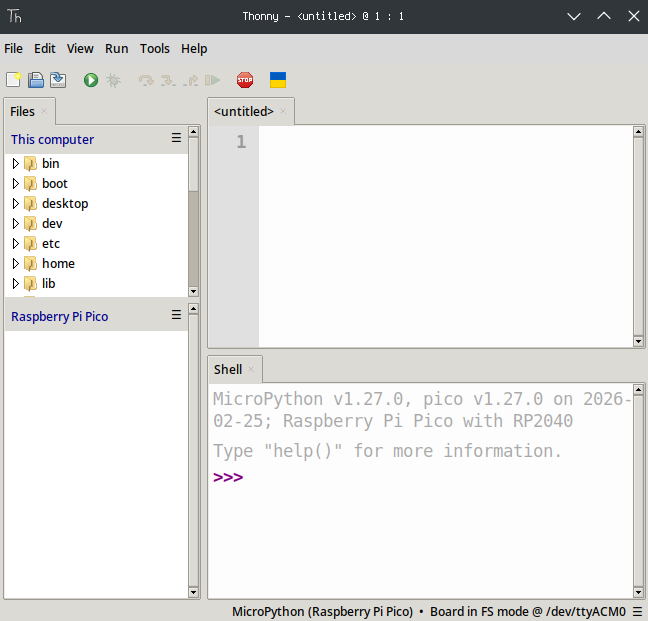
Nice! now we can easily transfer files from our computer to the microprocessor. Do note that this is the only way to transfer images, using file managers to drag and drop doesn't work.
If for whatever reason the microprocessor poops itself and refuses to connect or work, you can wipe the flash memory by flashing the file down below, it comes directly from the raspberrypi domain. Unzip the file and hold down the BOOTSEL button while plugging the microprocessor before dropping this bad boy in.
nuke.uf2With the boring preparations out of the way, I've coded a very simple gif emulator to aid Abby, a wholesome bat, showcase her abilities. Keep in mind the screen resolution of 320x240 pixels which means you will likely want to resize your images to fit your code, feel free to copy some parts.
import time
import jpegdec
from picographics import PicoGraphics, DISPLAY_PICO_DISPLAY_2

display = PicoGraphics(display=DISPLAY_PICO_DISPLAY_2)

j = jpegdec.JPEG(display) # Create a new JPEG decoder
display.set_backlight(0.5) # 1 = Giga Bright, 0 = Lights Out

while True:
    j.open_file('1.jpg') # Open the JPEG file
    j.decode(0, 0, jpegdec.JPEG_SCALE_FULL, dither = True) # Decode the JPEG
    display.update() # Display the result

    time.sleep_ms(50)

    j.open_file('2.jpg')
    j.decode(0, 0, jpegdec.JPEG_SCALE_FULL, dither = True)
    display.update()

    time.sleep_ms(50)

    j.open_file('1.jpg')
    j.decode(0, 0, jpegdec.JPEG_SCALE_FULL, dither = True)
    display.update()

    time.sleep_ms(50)

    j.open_file('3.jpg')
    j.decode(0, 0, jpegdec.JPEG_SCALE_FULL, dither = True)
    display.update()

    time.sleep_ms(50)

    j.open_file('1.jpg')
    j.decode(0, 0, jpegdec.JPEG_SCALE_FULL, dither = True)
    display.update()

    time.sleep_ms(200)

    j.open_file('4.jpg')
    j.decode(0, 0, jpegdec.JPEG_SCALE_FULL, dither = True)
    display.update()

    time.sleep_ms(500)
Note that this example is for the jpg format, if you'd like to use the png format then click the button down below for example code.
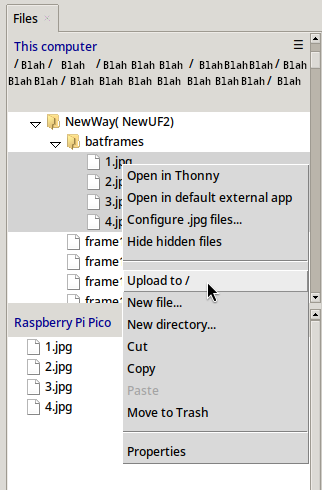
Uploading Images
In the "This Computer" tab, navigate to where your images are, if you have multiple you can hold shift and click the other ones to multi-select. Right click which will give you a popup, clicking the "Upload to /" button will send the selection to the root of the microcontroller's flash memory.
After writing code, you can hit Ctrl+Shift+S which will ask you where to save the code, click the Raspberry Pi Pico and make the title of the file "main.py"
You can hit F5 to run the code you've written or pasted in the editor. One neat thing is that since you saved the code to the flash memory, it will automatically run once you give the microprocessor power, it doesn't need to be connected to a computer. Here's the finished product.

Very cute! shoutout to xzorgothoth for the original artwork of Abby.