- 1up arcade video input -
Synopsis
This tutorial will show you how to add video input capability to your 1up arcade machine. The video signal the screen receives is wired to the motherboard by default.
We can bypass the connection to add our own screen controller to add video input capability, do note that the power will go to the screen controller, not the motherboard. You can use the same power supply used to power the arcade machine, the voltages should be the same, you can verify this if you don't want the magic smoke.
I don't recommend you to keep the motherboard connected if you are doing this mod as you would need another power supply and create a switch which changes between input sources, motherboard or screen controller. You can hotswap the connections if you are comfortable touching the electronics and leaving the back open though, it's up to you.
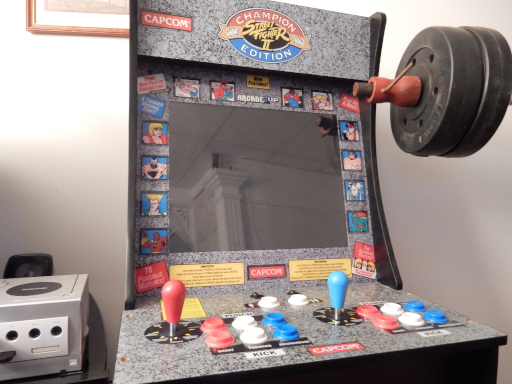
Tutorial
I will start by saying you will need to purchase an LCD controller, online marketplaces are flooded with these controllers as this mod is very common. You need to verify the specific serial number of your LCD display to order a compatible screen controller, I will explain further as we progress.
Start by opening the back of the machine, you will see an ominous grey box, it contains the motherboard of the machine and no it won't kill you. Everything in the machine operates at low voltage, the power supply can output a maximum of 12V, 3A to the motherboard so don't poopoo yourself.
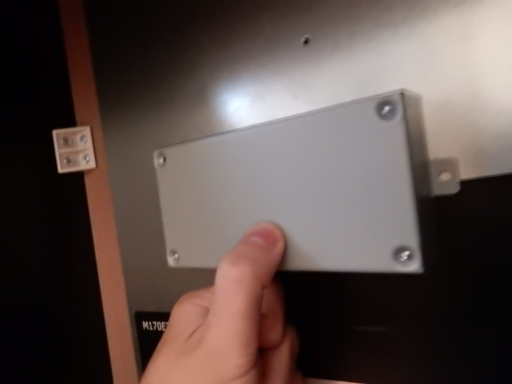
Remove the two screws which are horizontally positioned on each sides of the box. You'll then be left with some wires holding the motherboard to the screen, gracefully remove the cables FROM THE MOTHERBOARD, do NOT try to disconnect what comes from the screen as you will damage the LCD as the cables are part of the assembly.
Now you can remove the four screws in the corners of the box which are holding the motherboard in place.

After doing this, the motherboard should be free from anything restricting its movement, you can throw it in the trash or keep it if you want to eat the capacitors, we won't be needing it for the rest of this tutorial.
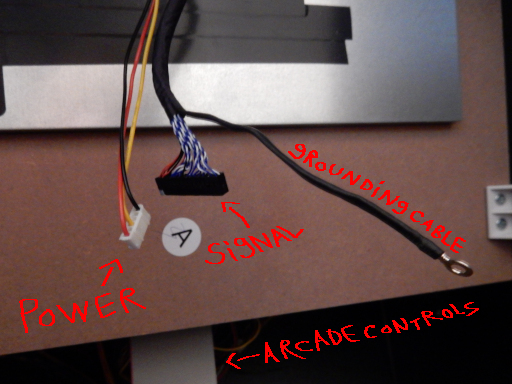
You may have already noticed, there's a prominent cryptic sequence of characters on the backside of the screen in the lower-left corner. That's the serial number of the screen you have, be sure to include this serial number when searching for LCD display controllers.

I'll now assume that you have the controller. In my case, I ordered a controller that has a VGA input, I went with it because these displays are kind of shitty and VGA seemed like a good "whatever" choice.
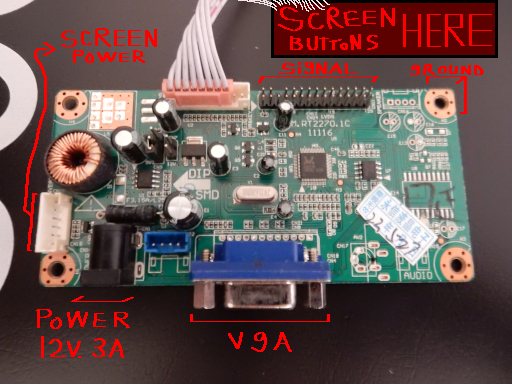
Most of this is self-explanatory as the connectors are the same, do note that the screen power connector must be inserted in the correct polarity otherwise you might fry the shit, thankfully the connector only allows you to insert it one way unless you falcon punch it in there.
Here's how it's supposed to look. (ignore electrical tape)
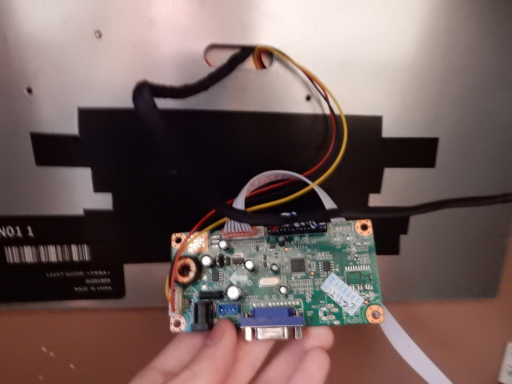
I recommend you to place double-sided tape on the back of the controller and place it under the LCD screen, such that the tape makes contact with the wood, not the screen.
If you do stick the controller to the screen, like I stupidly did, it will eventually fall off quite quickly as you cannot put a lot of pressure on the board to properly stick it on as you risk damaging the LCD display, baaaah.
Proceed by insering the power and respective display cable in the controller board.

Now we will need to make a hole in the back of the arcade machine to route our cables. You can do this however you want, I used a hole saw drill bit to decimate the wood, can you tell I don't use powertools often?

Before screwing the back panel you can insert the button cable through the top hole which is normally used to pull the back panel off, like so. This will make it so that you are able to control the screen settings without taking the machine apart.
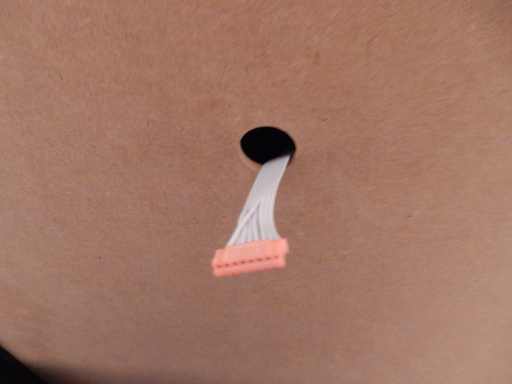
Attach your buttons to the cable & we are done! you can play any media you wish onto your arcade machine granted you have the right connector. I recommend you to browse through the menu on the LCD controller to adjust settings, my arcade screen had the blue and green values turbo clocked.
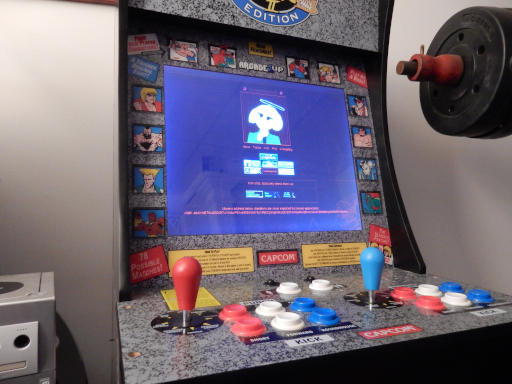
The viewing angles are atrocious but it looks fine when directly facing the screen. When I first opened the machine I laughed at how empty the insides were, it's quite the difference when compared to an oldschool arcade.
Useless Info
This machine was a gift from one of my friends which I was supposed to repair for them. The arcade had stuck buttons due to dust & grime which had accumulated, I cleaned everything but there was another problem, I could navigate the select screen but when I tried to start any game it shat itself, freezing indefinitely until a power reset.
When in testing mode "volume key failed" appeared, my search engine found absolutely nothing about this error code. From my general knowledge I thought the NAND chip on the motherboard was cooked as the term "volume" can be terminology for a unit of data storage but I unfortunately had no feasible way of testing if this was true.
(Yes I did also check the physical volume button)
If my diagnosis was correct (or not, it wouldn't have changed the broken state) they would have needed to have the motherboard replaced due to the individual NAND chip pre-flashed with the ROMs not being available anywhere. The specific motherboard type was around 90 to 150 dollars, they decided it was better to give the machine to me.
These arcades can get dusty as fuck if left alone for long periods of time, I highly recommend occasionally wiping the controls and front of the arcade with single use wipes or whatever you have on hand, it gets NASTY!!!
Disclaimer
I am not responsible and should not be held accountable if you break anything as a result of following this tutorial.